Custom Step Types test software tool;
Within this document we describe the function of our fastATE® Custom Step Types software tool.
The intention of this software tool is to enable engineers that only have a basic-know how in developing test sequences in National Instruments TestStand®, to create correct and consistent TestStand® test sequence programming code, using a simple menu driven interface.
If you want to develop test sequences in TestStand® you need the TestStand® development license to be installed on your computer. But with the fastATE® Custom Step Types software tool the much lower cost “TestStand® deployment licence” can be used to execute the generated TestStand® test sequence. This leads to a substantial cost saving, in software licences.
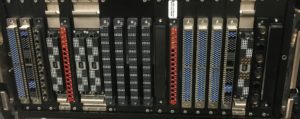
We recommend using our Generic User Interface (GUI) “Ph6 operator interface” as the communication interface between the operator and your test system and test programs. Phi6 will control the entire test platform and YAVModules. Depending on the Unit Under Test (UUT) you want to test, it will automatically load and start the correct TestStand® test sequence for this UUT. Phi6 software is available from 6TL as optional software. Even if you have your own developed operator interface or work with a third party operator interface you can still benefit from our fastATE® Custom Step Types software tool. Anyone with basic LabView® and TestStand® skills and an understanding off functional test, will be able to generate an automatic test sequence with our fastATE® Custom Step Types software tool.
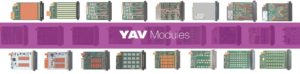
The method used to enable you to simply develop complete TestStand® test sequences with the fastATE® Custom Step Types tool is done In combination with the labels (tag’s) used with all 6TL YAVModules. These labels can be programmed using the 6TL Phi6 Explorer software tool, a free software package supplied with each 6TL YAVModule.
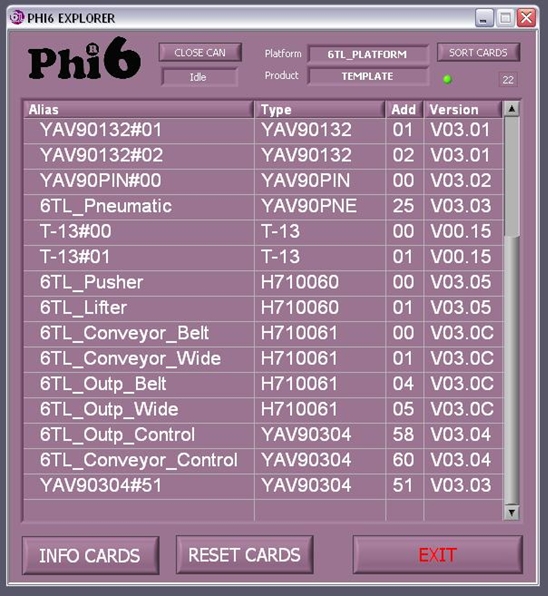
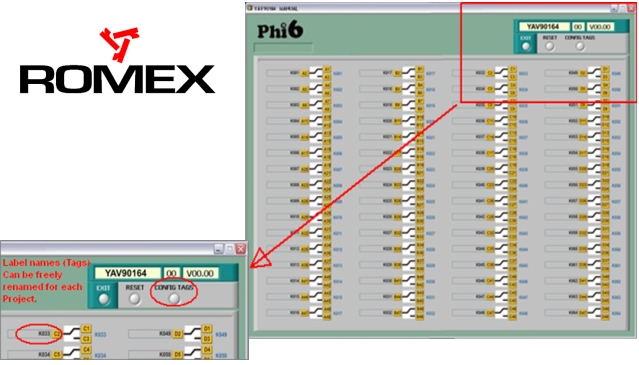
After opening Phi6 Explorer the window on the left will be visible. It will scan the CANBus and shows you a list of all 6TL modules attached to the CanBus.
After selecting a YAVModule the corresponding configuration and calibration window will be opened. For example for the 6TL YAV90164 switch matrix it will show a green window like below.
With “Config Tags” the software will enable you to change the names of each, relay, to a more common name, matching your wiring and signal naming used in your schematics or wiring documentation for your test fixture and UUT.
The same is valid for any Digital or analogue Input, Output, measurement channel, PSU output, load input, etc.
After you have labelled all measurement signals to the corresponding relay, input or output etc., you will open the TestStand® sequence editor, switch to the edit mode and drag the 6TL-YAVControl (A) into your test sequence. (Alternatively you use your right mouse button and select it from the menu)
6TL-YAVControl will be visible if you obtained the entire YAVmodules package. Different packages will be available containing I/O, switching, PSU, Measurements, VirtualBench® or other instrumentation that you might have purchased the fastATE® Custom Step Types tool for. After a right mouse click on your inserted 6TL-YAVControl line you select the Edit function from the list and the “6TL Control” dialog window, shown below, will open.
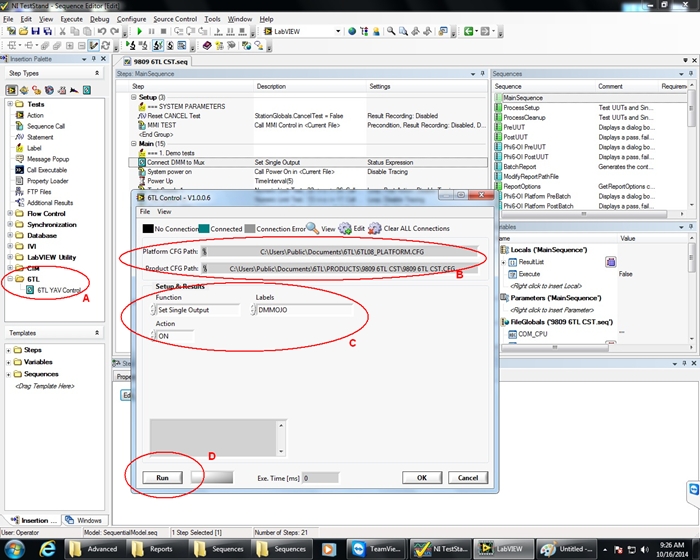
In Section (B) of this “6TL Control” window you will (only ones) define the path where the system can find the programmed Tags / Labels as explained on Page 1. Based on this information and the specific custom step type you have dragged into your test sequence, you will then be able to select “Function” (C). For instance “Set Single Output”.
In the “Labels” list, you will then see all the relevant tags / labels that are possible to set with the instruction “Set Single Output”. You then select the label corresponding with the output you want to set and select the variable “Action” “On or Off” in the third pull down menu .
By selecting “Run”(D) you can verify the action and if you press “OK” the sequence will be generated and inserted in your TestStand® test sequence.
The Big advantage of using the fastATE® Custom Step Types tool is that independent of who is creating the program, the sequence generated will always be 100% the same. So you final TestStand® program will look always consistent, independent of who developed the TestStand® test sequence. This will ease the support and streamline all your programs in time and make debugging or fault finding them simple and easy even if you have multiple test systems in your factory or other factories all over the world.
In the example below we can set all relays on the 6TL YAV90059 switch module, to a specific state (like a Reset)
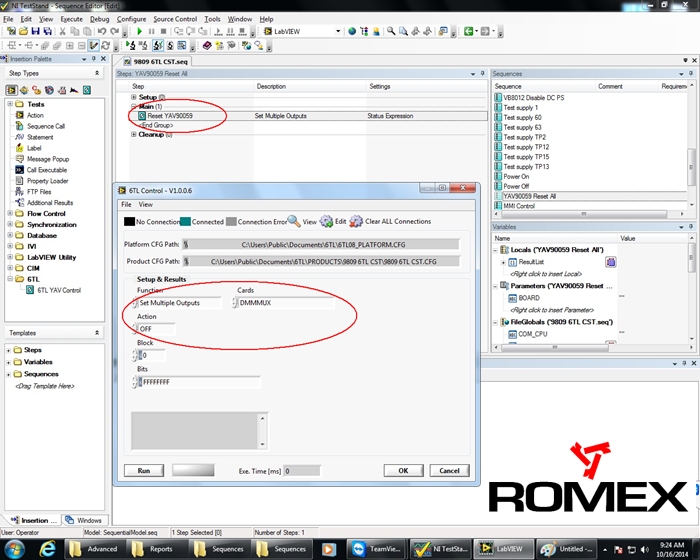
As we select the instruction “Set Multiple Outputs” we cannot select individual labels (Tags) or channels but need to make a selection out of the boards that we have in our system under “Cards” These are mentioned in the Platform Config file selected in the top of the window (B). If we select “OK” the program instructions needed in TestStand® to set all the relays on the particular YAVBoard will be implemented in our TestStand® test sequence.
As you can see with a basic knowledge of TestStand® programming you can now quickly, consistent and fast create a TestStand® test sequence. In case you want to program a special sequence that is not supported by our fastATE® Custom Step Types tool, you will always have the option to generate the Sequence within TestStand® itself. But then you will have to be the owner of a TestStand® development Licence. The above samples show the use of fastATE® Custom Step Types tool under the TestStand® development suite.
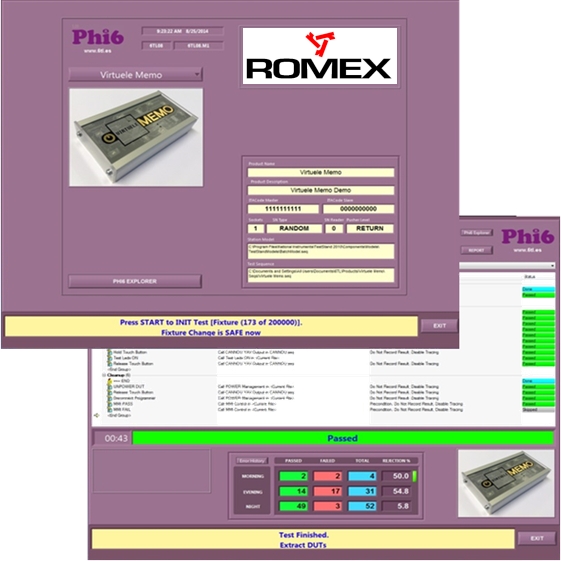
Below picture is showing the generated test Sequence being executed in the Phi6 operator interface software from 6TL.
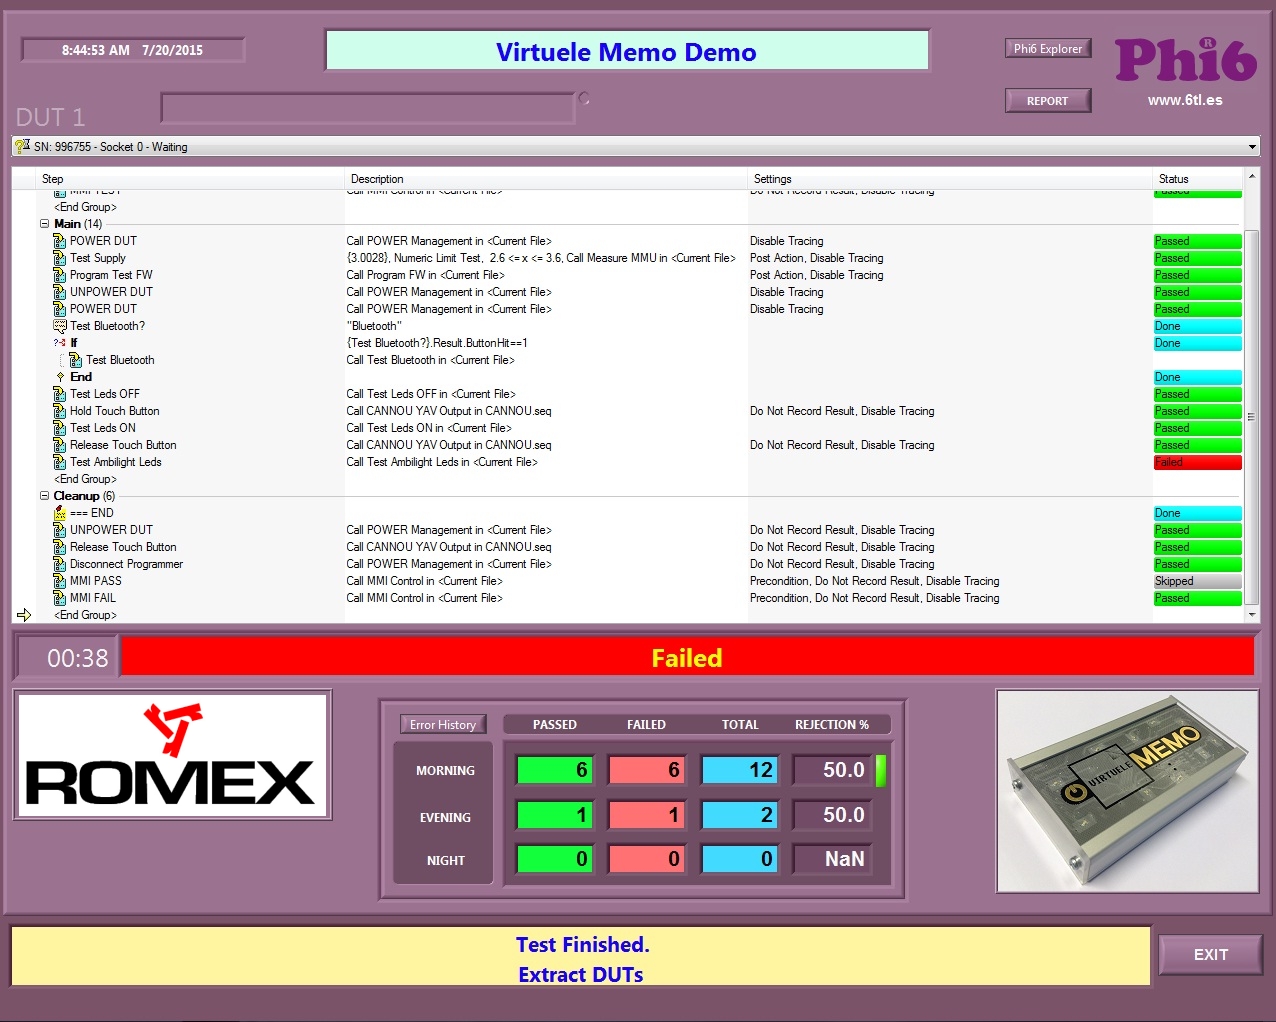
fastATE® Custom Step Types tool will offer the same power as TestStand® but at a largely reduced cost and programming effort.
Want to know more let us know and use below form to react.
![]()